Can your ability to do more pushups prolong your life?
The question might sound like a joke, but science has recently focused on better ways to predict lifespan. And, one study found that your ability to crush pushups might determine if you can fight off cardiovascular disease.
The power of pushups has been linked to everything from lower blood pressure and blood sugar, to healthier cholesterol and triglycerides.
And, it’s not just pushups. The link between bodyweight strength and your health is becoming too hard to ignore.
A study of 1 million people found that the better your grip strength — which is linked to your ability to do more pullups — the less likely you are to die of premature death.
Now, that’s not to say bodyweight strength is the key to a long life. Many factors will play into the full picture of your health. But, building more bodyweight strength is a good predictor of longevity, and a great foundation for a strong body that can help you live a better, healthier life.
If you want to invest in your body, you don’t need a fully stocked gym, or even minimal equipment like a barbell or dumbbells, to see some incredible results. That’s because your body does NOT need weights to change; it requires resistance.
Your bodyweight can be used to create an amazingly effective workout that leads to a total body transformation.
And bodyweight training isn’t just for beginners. You can take advantage of the benefits of bodyweight training no matter how many years you’ve spent in the gym.
If you’re looking for a place to start — or a new way to challenge yourself — this guide will break down all of the different ways you can use bodyweight training to burn fat, build muscle, and upgrade your health.
Table of Contents
The 4 Biggest Benefits of Bodyweight Training
Bodyweight training shouldn’t just be your backup when you can’t find equipment. That’s because there are seemingly endless ways to use your own body weight to progress (make it harder) or regress (make it easier) a wide variety of exercises that target all of your main muscle groups. Not to mention, almost every strength training movement that you can do with dumbbells or barbells can be built on a foundation of bodyweight mastery.
Here are 4 reasons why bodyweight training is a good idea to incorporate into most workout programs.
You can do bodyweight training anywhere.
As long as your toddler (and dog) allows it, bodyweight workouts can happen in any room in the house, the garage, or even your local park.
This is important because the primary reason so many workouts fall short of the results you want is sustained consistency. Focusing on heavy weights is great — but not if you can’t lift them when needed.
The fact that you can do bodyweight workouts anywhere can help you build long-term consistency. Showing up week-after-week is where the real magic of training happens.
When you remove steps (like driving to the gym and parking), building and sticking with any new routine becomes more straightforward.
So, whether you focus on 1-2 bodyweight-only training days, or build your entire program around bodyweight movements, having an option that includes fewer barriers can play a key role in your success.
Bodyweight training creates real-world strength.
Barbell lifts have been proven effective over the decades. But, at the end of the day, they’re just a tool.
If you’re a powerlifter looking to improve your absolute strength (your 1-rep max), then they’re the right tool. But, for the rest of us, it can be a mistake to assume your workouts need to be built around gym equipment or lifting increasingly heavy weights solely.
One of the rules of strength training is progressive overload; and, thankfully, there are many different ways to overload your muscles, whether it’s with more reps and sets, or making exercises more difficult, which you can do without adding weight.
Instead of just measuring strength in turns of weight added, look to build what’s called relative strength. This is how well you move and control your body in space. Think of a gymnast performing on the rings. The way they’re able to control their body and hold positions we can only dream of is a high-level example of relative strength.
And there’s no better tool than your bodyweight to build relative strength.
Bodyweight training helps you build muscle.
Based on Brad Schoenfeld’s excellent research, both beginners and more advanced lifters can build muscle with zero equipment on hand.
The secret? It’s about finding the point where you can bring your muscles to failure. Schoenfeld’s research found that you can build an equal amount of muscle with lower reps (and more weight) and higher reps (and less weight). But, the key finding was that when you’re not adding as much weight, you need to push your muscles to failure, even if that means doing upwards of 25-35 reps within a set.
Oftentimes, many of us stop our workout sets well short of absolute failure, or pick an arbitrary rep range, such as 8-12 reps. This is easier to assess with barbells and dumbbells, but, when you move to bodyweight training, you’ll want to get a better sense of how many reps you can do before you can’t do any more.
In general, if you leave 1-2 reps left in the tank most of the time, then you’ll reduce your chance of injury and still build muscle.
But, as you get better and stronger with bodyweight training, you’ll need to start pushing each set as far as you can to build maximum amounts of muscle.
Bodyweight training is joint-friendly.
Do you want to train pain-free for years? Then master fundamental bodyweight movements before adding weight.
With traditional weight room lifts, it’s easy for your strength to outpace your stability. If you can squat 400 pounds yet fall over when we ask you to stand on one leg, your chances for injury are much higher.
This strength imbalance is less likely with bodyweight training. No matter what move you choose, each demands just as much stability as strength. This protects your joints. Not to mention, adding bodyweight training can make that 400-pound squat that much more stable (and strong).
Bodyweight training also prevents injury because it’s self-limiting. This means that as you fail on a lift (can’t…do…one…more..rep) you stop moving and collapse to the ground. When that happens in a bench press, you drop the bar on your face. I think you can see which one has the higher potential for injury.
There’s one caveat here: bodyweight plyometric training is NOT joint-friendly.
For most people, one minute of squat jumps, split squat jumps, or even burpees could eventually lead to overuse injuries. If you’re looking to increase your heart rate and do cardio, there are plenty of safer moves you can use to accomplish that (and we’ll discuss those more below).
Warmup: Quicker, Easier, and Fewer Injuries
Whether you’re trying to lose fat or build muscle — consistency is the key. And the #1 reason people struggle to stay consistent with bodyweight training (or any training for that matter) is pain and injury.
As it turns out, some of the best bodyweight exercises are great for warming up, which is a helpful way to help limit and produce injuries.
A quick warm-up to prepare your body to produce force. Think of your muscles like a cold rubber band that you pull out of the freezer. If you try to challenge the band in any way, when it’s frozen, it will snap.
Your muscles are the same way. If you’re like most people, you’re likely stuck in a chair for 8 hours a day (or more) every day, and all that sitting reduces your mobility and makes you more prone to injury.
A good warm-up helps you offset your day-to-day sitting. And, a great warmup doesn’t require static stretching (yeah, it’s boring) or take as much time as you thought.
An effective and quick way to prepare your body is by incorporating something known as “movement flows.” These equipment-free sequences move your body through a wide range of motion, activate your muscles, and prime your body to perform with a lower likelihood of pain or injury. And, it only takes about 2 to 3 minutes to complete.
Need more warm-up inspiration? Be sure to check out our blog post on quick warm-up routines.
Bodyweight Exercise 101: Moves For Every Muscle Group (Easy and Difficult Variations)
To help you become better at bodyweight exercises, we’ve created two different categories for each body part.
First, you’ll find what we consider core movements. Instead of an exhaustive bodyweight playlist, we chose to highlight the moves that provide the most bang-for-your-buck. This is where you should spend the majority of your training.
Then, we’ll show you one advanced bodyweight exercise for each body part. You might not be able to perform the advanced move right now, and that’s OK. In no time, you’ll be able to improve your relative body strength and take on more challenging variations.
Bodyweight Back Exercises
Easiest Option: Superman W/T
You’re probably no stranger to the risks and downsides of lower back pain, and yet, very few people focus on lower back exercises.
The superman exercise is a great way to both build endurance in your lower back and helps groove shoulder health.
Start by lying on your stomach with your arms to your side and elbows bent 90 degrees. If we were standing above you, it would look like your arms and head form a “W.” Now, squeeze your glutes and your lower back to raise your head and chest off the floor. Hold this position while drawing your shoulder blades together and raising your arms off the floor.
The setup for the Superman T is the same. The only difference is that you’ll keep your arms straight to form a T as you raise them.
Pillow Case Face Pull
Grab a spare pillowcase from the closet and target your upper back (including your traps) with the face pull. Grab the ends of the pillowcase with each hand. Raise your hands to shoulder height so your arms are perpendicular to your torso and your palms face the floor. This is your starting position. Then, squeeze your upper back and try to row the weight to your face, bringing your hands as close as possible to your ears. Reverse the movement and extend your arms back to the starting position.
Archer Pillow Case Door Row
While you’ve got the pillowcase out, it’s time to build back and grip strength with a low-row. Set your start position: Grab the ends of the pillowcase with each hand and raise your hands to shoulder height so your arms are perpendicular to your torso and your palms face the floor. Squeeze your upper back and pull your elbows down and back by your side. Reverse the movement and extend your arms back to the starting position.
Inverted Row (barbell, chairs + broom, TRX)
No pullup bar? No worries. You can make this popular gym move work at home with a little creativity. First, let’s talk about the setup. You’ll need to place a thick broomstick (or shovel, etc.) between two chairs, couches, etc. Make sure the chairs are high enough to allow you to hang under the broom with your arms fully extended. Please be sure the bar will not roll off mid-exercise.
To execute the exercise, begin by lying directly under the broomstick with your knees bent 90 degrees and your feet on the floor. Grab the broomstick with a wider grip than your shoulders so that your hands are near the chair. Squeeze your glutes, and lift your butt off the ground. This is your starting position. Squeeze your upper back and pull your body up to the broomstick, stopping a few inches short of touching it. Reverse the movement and extend your arms back to the starting position.
Chin-up/Pull-up
The pullup is arguably the best bodyweight back exercise for both strength and building muscle.
Whether you’re doing a pullup or chin-up, performance starts with a great setup. That means gripping the bar tight and engaging your core.
To start the movement, think about pulling down on the bar and driving your shoulder blades into your back pocket. As you pull yourself higher, think about putting your elbows in your back pocket until your head clears the bar. Then, control your body all the way back down to the hang start position.
It would be best if you set up the pullup in a very similar way. Get your grip tight, squeeze your core and pull the bar down to start the movement. But instead of thinking about putting your elbows in your back pocket, you’re going to drive your elbows towards your ribs.
ADVANCED: Slider Pullover
You’ve probably never seen this move, but it trains the lats (your most significant back muscle) in a way that’s hard to replicate outside the gym. You’ll need a pair of carpet sliders, paper plates, or even a towel on the kitchen floor.
To set up for this move, start in a modified push-up stance – hands directly under your shoulder and your knees resting on the sliders. Your body should form a straight line from your knees to your head. Squeeze your core and push the ground away from you so that your knees start sliding away from your hands. Slide-out only as far as you can maintain your core position (no low back sag!). Now, pull the ground towards you with your hands and slide the knees back to the starting position.
Bodyweight Chest Exercises
Prepare yourself for a wide variety of pushup options. While it may seem like a pushup is just a pushup, there are many ways to adjust this timeliness classic to make the movement easier or harder.
Easiest Option: Incline Push-up
If you struggle with doing pushups on the ground, you should start with the incline pushup instead of knee pushups. They help you build the specific core and upper body strength necessary to knock out your first pushup and many more.
Start by placing your hands on a bench, bar, or even the couch. Walk your feet back on your toes until your arms are directly in front of your chest. This is your start position. From here, squeeze your core and the front of your legs to create tension. Now, pull yourself down towards the bench with your upper back. Lower until your elbows are just past your body, and then push yourself away from the bench.
Push-up
The setup for the classic pushup is very similar to the incline pushups, only we’re now setting up on the ground. Start in a full plank position – arms straight, hands just outside your shoulders, and head in line with your spine. Squeeze your core and screw your hands out against the floor (like you’re opening a jar of pickles). Now, pull yourself down towards the floor with your upper back. Lower until your elbows are just past your body and then push yourself away from the ground, finishing long through your upper back.
Decline Push-up
The decline pushup not only challenges your chest but demands far greater core and shoulder strength as well.
Place your feet on a 12-16” object (the higher you go, the more this move will target your shoulders and not your chest) and find your full plank position. Your hands should be in line with the front of your shoulders and not your eyes. From here, pull yourself down towards the floor with your upper back. Think chest first on the way down so that your hips don’t sag. Lower until your face almost touches the ground, and then push yourself back to the start position.
Parallette Push Up
One of the best ways to get stronger in any movement is to increase the range of motion. With parallette pushups, you’re able to get much deeper in the bottom of the pushup, increasing muscle activation in your chest and shoulders.
The same pushup cues apply: Start with your hands under your shoulders, your body in a nice straight line, and your core squeezed. Lower yourself towards your hands until your hands are almost in line with your chest. During this move, it’s essential to feel like you’re “pulling” yourself down by squeezing your upper back so that you protect your shoulders. Now, reverse the movement and push yourself away from the handles.
Dips
Dips are an incredible exercise for your chest (and your triceps). However, the dip is also a complicated exercise that requires a great setup to perform safely.
First, grab the handles of the dip bars and jump up. Keep your legs and arms straight. Screw your hands outward against the bar and squeeze your core. To lower into the bottom position, allow your chest to drop forward. Like the pushup, imagine pulling yourself down. Allow lower as far as you control before pushing through the elbow to return to the start position.
ADVANCED: Pushup with arm reach
This move shifts more of the demand to one side of your body, making it one of the best ones to train your chest (and core) as you get stronger.
You’ll need a pair of furniture sliders or a towel on a smooth floor. Setup in a good pushup position (see above exercises) with your hands on the sliders. As you begin to lower into the pushup, squeeze your core, slide one arm out in front of your head and shift your weight into the other arm. In the non-reaching arm, keep your elbow tight to the body. Push yourself back up as you pull the other arm back to the start position.
Bodyweight Shoulder Exercises
Lateral raises (and their many variations) might be a great way to build your shoulders with weights, but there’s no shortage of movements to help you carve the 3 main muscles in your shoulders, while also helping improve shoulder health and stability and reduce the likelihood of injury.
Easiest Option: Shoulder Taps
The start position for shoulder taps looks very similar to the traditional pushup. Your arms should be straight, hands just outside your shoulders, and your head in line with your spine. The only difference is the width of your feet. In this move, they should be outside of hip width. Get your belly tight and then slowly lift your left arm off the ground and touch your opposite shoulder with your hand. Return that arm to the ground and then lift your right arm off the ground and touch your left shoulder. Continue repeating this pattern for reps.
Inchworm
The inchworm is one of our favorite sneaky shoulder moves. Inchworms require both strength and stability from your shoulders while also throwing in a fair bit of mobility for your lower body.
We’re right back in the pushup position to set up for this movement. You know the drill – get core engaged and make sure your body is in a straight line from head to toe. Begin the move by slowly tiptoeing your feet towards your hands. As your butt gets higher, think about pushing the ground away from you. When you’ve gone as high as you can (you’ll look like a teepee), slowly walk your hands out away from your feet until you return to the pushup position. Keep your belly tight on the way out!
Reverse Bear Crawl
Crawling probably isn’t part of your regular shoulder routine, but it should be. Give this move a try to build shoulder-safe upper body strength.
To begin, rest on your hands and knees on the ground. Your hands should be directly under your shoulders and your knees directly under your hips. Now, hover your knees just off the ground. This is the start position. Begin the move by reaching back with one leg and the opposite arm. Think about driving yourself away from the ground. After taking a small step, repeat with the opposite arm and leg.
Pike Pushup
https://www.youtube.com/watch?v=sposDXWEB0A
The pike pushup closely replicates the overhead barbell press. But, instead of trying to press the bar away from your body, you’re going to press your body away from the floor.
Start by placing your hands on the ground just outside of shoulder width. Walk your feet forward until your body forms an a-frame position with your legs straight. It would be best if you were looking through your legs at this point and not the ground. Begin by bending both elbows and lowering your head down and out towards your hands. Try to lower until your head touches the ground and then push yourself away from the floor to return to the starting position.
ADVANCED: Pike Pushup with Feet Elevated
Outside of the handstand pushup (which we didn’t include in this guide due to injury concerns), this is one of the most challenging bodyweight movements that builds both upper body strength and muscle.
Start by placing your hands on the ground just outside of shoulder width. Then, place your toes on a box behind you and lift your body into the air. Walk your hands back toward the box until your body forms an a-frame position with your knees slightly bent. Begin by bending both elbows and lowering your head down and out towards your hands. Try to lower your body until your head touches the ground and then push yourself away from the floor to return to the starting position.
Bodyweight Triceps Exercises
A great set of arms isn’t just about your biceps. Your triceps are actually a bigger muscle, and they play a key role in bringing out the definition of your arms. You’ll be performing more pushups, each with a slight adjustment to place more tension on your triceps instead of your chest.
Easiest Option: Plank to Push-up
Assume a plank position on the ground. Your forearms will be under your shoulders, your back straight, and your core engaged. Now, “push the ground away” with one arm and then the other arm to fully extend both arms. At this point, you should be resting on the palms of your hands in a push-up position. Drop back down one arm at a time and repeat.
Close Grip Push-up
This is very similar to the classic pushup but with a slight adjustment to your hand positioning. Start in a push-up position with your hands directly under your shoulders. To start the move, pull yourself towards the ground with your upper back. As you lower, your elbows stay tight to your sides (which will load your triceps more). Lower slowly down, and make sure to keep the elbows close to your side. To return to the start position, squeeze your triceps and push the ground away from you.
Tricep Plank Push-up
The tricep plank push-up is an advanced version of the Plank to Push-up. Again, start in a plank position with your forearms under your shoulders. Make sure your core is tight! Now, push the floor away with your forearms and triceps at the same time – this will bring your body up into a push-up position. From here, control your movement and bend your elbows to get yourself back to the start position.
Tricep Bench Dip
The way most people do this popular bodyweight tricep exercise is setting them up for potential injury. Here’s how to do it right.
Standing in front of a bench (or couch), reach down and back behind you to place your hands on the bench. Make sure your fingers are pointing away from you on the bench and not straight ahead. Your legs should be straight and out in front of your body. Now, pull yourself down, allowing your butt to drop towards the ground. To protect your shoulders, STOP when your elbows form 90 degree angles. Squeeze your triceps and press the bench away from you to drive back to the start point.
ADVANCED: Elevated Bar/Couch Bodyweight Tricep Extension
This bodyweight move targets your triceps just like a barbell skull crusher, and throws in a ton of core work for good measure.
Start by setting up like you’re going to do a push-up with your hands on a bench or barbell in a rack. Walk your feet back until your hands are past your head. If you’re looking straight ahead, you should be looking under your hands. This is your start position. Now, bend your elbows and lower your body until your head passes through your arms. Squeeze your triceps to drive back up.
Bodyweight Bicep Exercises
When you think about upper body exercises, your biceps are likely one of the first muscles that come to mind. But, traditionally, you isolate that body part with the types of movements that require equipment.
Luckily, there are plenty of ways to manipulate curl variations and apply slight variations to other exercises that increase the intensity on your biceps.
That’s because training your biceps is all about creating tension. And, even if you only have everyday household items, like a bathroom towel, you can make far more arm gains than you think.
Easiest Option: Towel Bicep Curl w/ Iso Pullapart
Grab a hand towel (but any towel can work) and start by holding the towel with both palms facing the ceiling. The towel should have just a little slack in the middle. Now, grip the towel tight and drive your hands outward. This will create a ‘tight’ towel. Keeping the tension on the towel, slowly curl your palms toward your shoulders.
Pillowcase Bicep Body Rows
It’s time to raid the linen closet before your next workout. Secure two pillowcases to the top of a closed door. Please be sure they are snug and will not slip.
Grab the ends of the pillowcase with each hand. Raise your hands to shoulder height so your arms are perpendicular to your torso and your palms face the ceiling. This is your starting position. Then, squeeze your biceps and try to row your palms to your face, bringing your hands as close as possible to your face. Reverse the movement and extend your arms back to the starting position.
Supinated Grip Inverted Row (TRX, bar, broomstick)
The inverted row should be one of your go-to bodyweight back moves. But, by changing your grip on the bar (or broomstick), you can force your biceps to do more work. You’ll need to place a thick broomstick (or shovel, etc.) between two chairs, couches, etc. Make sure the chairs are high enough to allow you to hang under the broom with your arms fully extended. Please be sure the bar will not roll off mid-exercise.
Now, to execute the exercise lay under the broomstick with your knees bent 90 degrees and your feet on the floor. Grab the broomstick with a shoulder-width grip, and your palms facing the bar. Squeeze your glutes, and lift your butt off the ground. This is your starting position. Squeeze your upper back and biceps to pull your body up to the broomstick, stopping a few inches short of touching it. Reverse the movement and extend your arms back to the starting position.
Close Grip Chin-Up
If you want to build your biceps, start your workout with this move. The close-grip chin-up will activate your biceps more than barbell curls – and help you build total upper-body strength.
Grip the bar with your palms facing the bar. Your grip width should be inside your shoulders. Squeeze your core and start the move by pulling down on the bar. As you pull yourself higher, think about putting your elbows in your back pocket until your head clears the bar. Then, control your body back down to the hang start position.
ADVANCED: Bicep Chin Curl
This chin-up cranks the bicep challenge up to 11. While this may look like a normal chin-up at the start, the real difference is how you perform the exercise.
The setup is the same as the regular chin-up: Grip the bar tight with your palms facing the bar. Squeeze your core and get tight. But, instead of letting yourself hang straight down from the bar, you’re going to lean back from the bar at the bottom position. Then, squeeze your biceps and pull up to the bar. Your head won’t clear the bar in this move. Instead, you’ll bring the bar towards your face and stop there. Lean back as you extend the arms to return to the start position.
Bodyweight Leg Exercises
Your lower body might be best equipped to take on a steady diet of bodyweight exercises without ever feeling like you need the gym. While you can build strength and muscle just fine with upper body movements, there are so many more equipment-free ways to challenge your legs.
And, unlike many popular weighted exercises (we’re looking at you squats), bodyweight variations of many lower body movements are rarely associated with aches and pains because it’s easy to put yourself in a position to master the movements.
Here is a full buffet of bodyweight leg exercises that will make you convinced you don’t need weights for an incredible workout.
Easiest Option: Bodyweight Squat
Do not sleep on the bodyweight squat. While you might dismiss the movement without weights, learning how to squat correctly might change the way you move.
A big part of feeling better when you squat is understanding your body and foot positioning. To find your starting squat position, you’ll need to experiment. Many people simply assume you’ll want your feet shoulder-width apart. And, while that’s a good place to begin, it’s not what’s most comfortable for everyone. Play around with the width of your stance and your toes’ direction (pointing straight ahead or angled out) during your squats. Which position feels the most natural and allows you to sink the deepest? Go with that.
Once you’ve found your stance, get your core tight and screw your feet into the ground. Now, break at the hips and sit straight down between your knees. Keep your chest up. How deep should you go? If your lower back starts to round, you’ve gone too deep. For most people, this will be around 90 degrees. Now, push the ground away to stay back up.
Reverse Lunges
More knee-friendly than forward lunges, reverse lunges are where most people should start with single-leg bodyweight training.
Start by standing with your feet shoulder-width apart. Bring your hands together in front of the chest and squeeze them together to create core tension. To begin, take a big step straight back with your left leg. As your back toes come into contact with the ground, allow your body to drop straight down. Stay tall through the chest, keeping your shoulder back. Drive off the front leg to come out of the lunge. Then repeat the movement, this time taking a step back with your right leg.
Cossack Squat
Most of us spend too much time training exercises directly in front of us or behind us, like a squat or reverse lunge. But, to better target your legs and keep healthy hips, you need to add some lateral moves like this into your workout.
Start with your legs in a stance that’s wider than shoulder-width apart. Relax one knee and shift your body weight to that side by reaching back with your hips. Keep your chest tall, and both heels on the ground as you drop into the hip of the squatting leg. Only go as deep as you control the movement, then push the floor away to drive out of that hip and return to the starting position.
Rear Foot Elevated Split Squat
The rear foot elevated split squat is arguably the best move (and maybe most-dreaded) you can do to build lower-body strength and stability.
Stand directly in front of a bench, low couch, etc. that is roughly mid-shin height. The back of your calves should be touching the bench. Now, take one giant step forward with your left leg, which is the right distance from the bench for most. Reach back with your right leg and place the top of your right foot (or your toes if the object is super low) on the bench.
Keeping the majority of the weight in your front foot allows your body to drop into the front leg’s hip while keeping the knee in line with toes. Go as low as you can control, and then drive the ground away with your front foot to finish the rep. Do all your reps, go back to the starting position, and then take a big step forward with your right leg, reach back with your left leg, and repeat.
ADVANCED: Shrimp Squat
Whereas most people assume the jump squat is the best way to increase the difficulty of the traditional bodyweight squat, we prefer a different approach that is challenging, but without the additional stress on your joints.
The shrimp squat requires outstanding single-leg balance, strength, and hip mobility. And that’s what makes it our go-to advanced leg exercise.
The start position is a shoulder-width stance while squeezing your core. Then, balance on one leg and bend the other knee 90 degrees. Bend at your knee and the hip to lower your body straight down. Feel like you’re reaching behind you with the bent leg. As you lower, allow your chest to reach forward and try to touch the ground with the bent knee just behind your plant foot – but you’re not allowed to rest it there. Drive through the plant foot to push back to the starting position.
Bodyweight Hamstring Exercises
While it’s easy to think that a healthy diet of squats and lunges will cover your lower body (they are an amazing foundation), there are a few targeted bodyweight movements that can help you work the backside of your legs. Oftentimes the forgotten muscles compared to your quads and glutes, these moves will help ensure balance and injury prevention.
Easiest Option: Glute Bridge Walkout
Lie on your back. Slide your feet on the floor towards your butt until your knees form a 90-degree angle. This is the start position. Squeeze your core and fire your glutes to lift your hips off the ground. At this point, your body should form a straight line from your knees to your shoulders. Now, keeping your hips high, slowly walk your feet away from your body until your legs are almost straight. Then, walk them back towards your butt until you return to the start position.
Tall Kneeling Good Morning
This move turned into one of my go-to bodyweight hamstring exercises during 2020’s quarantine because you can do them anywhere.
While resting on your knees, hook your feet under a low desk, table, or have your workout partner hold your ankles. Place your hands on your head, elbows out wide. To start the exercise, fold at your hips and allow your chest to drop. Your back stays straight the entire time as you lower your chest towards the ground. After you’ve gone as far as you can control, squeeze your hamstrings to return your upper body to the start position.
Natural Glute Ham Raise
The more challenging version of the Tall Kneeling Good Morning, this move replicates a glute-ham raise in the gym, and that means it’s one of the best lower-body strength moves you can do.
While resting on your knees, hook your feet under a low desk, table, or have your workout partner hold your ankles. Keep your chest tall and bring your hands in beside your chest, palms facing away from you. Now, hinging at your knees, slowly allow your body to fall away from the anchor. Go as far as you can control (probably not very far at the beginning) and then “catch” yourself in a pushup position. Give yourself just enough of a push with your arms and squeeze your hamstrings to return to the start position.
Paper Plate/Slider Leg Curl
Not just for picnics, paper plates can be a deceptively useful bodyweight training tool when paired with a hardwood floor.
Lie on your back. Place your heels on paper plates (or furniture sliders) and bring your feet towards your butt until your knees form a 90-degree angle. Squeeze your core and fire your glutes to lift your hips off the ground. At this point, your body should form a straight line from your knees to your shoulders. Keep your hips high, and slowly slide your feet away from your body until your legs are almost straight. Then, squeeze your hamstrings and slide them towards your butt until you return to the start position.
Single-Leg Deadlift
Just because we don’t have a barbell doesn’t mean we can’t train the deadlift pattern.
Start by standing with your feet shoulder-width apart with your hands at your side. To begin, shift your weight onto one foot and relax your knee on that side. Now, push your butt back and allow your chest to drop. Reach towards the wall in front of you with your arms and try to touch the wall behind you with the free leg. Your back stays straight. Drive off the plant leg and squeeze your glutes to come out of the deadlift.
ADVANCED: Paper Plate/Slider Single Leg Curl
Remember, any time we shift more work to one side of the body, we make an exercise that much more challenging. And trust me, this one is challenging.
Lie on your back. Place one heel on a paper plate (or furniture slider) and bring your feet towards your butt until your knees form a 90-degree angle. Squeeze your core and fire your glutes to lift your hips off the ground. At this point, your body should create a tabletop position from your knees to your shoulders. Next, bring the leg not on a slider up into the air until that leg is floating. From here, keep your hips high, and slowly slide your plant foot away from your body until your leg is almost straight. Then, squeeze your hamstring and slide your foot towards your butt until you return to the start position.
Bodyweight Glute Exercises
Training your lower body wouldn’t be complete without focusing on your glutes. Even though they’re one of the bigger muscles in your body, it’s easy to forget to include targeted work on your backside muscles. While squats and lunges are the foundation, these exercises will make your backside work just a little harder and offset all the time you spend sitting during the day.
Easiest Option: Glute Bridge
Lie on your back. Slide your feet on the floor towards your butt until your knees form a 90-degree angle. This is the start position.From here, squeeze your glutes and drive through your heels to lift your hips off the ground. At this point, your body should form a tabletop position from your knees to your shoulders. Relax towards the floor to complete the rep.
Side-Lying Plank w/ Leg Extension
Lay on your side; forearm tucked under your side. You should bend your bottom knee 90 degrees, and your top leg should be straight. Dig your elbow into the ground and push yourself up so that your elbow and your bottom knee support your entire body. Now, use the outside of your glutes, lift your top leg straight up and hold it there for 5-10 seconds. Relax back to the starting position by lowering your leg down.
Single-Leg Glute Bridge
This move takes the glute bridge up a notch. Not only will you have to rely on only one leg to lift you up but your glutes will also have to prevent rotation during the move as well. This cranks up the muscle tension.
Lie on your back. Slide your feet on the floor towards your butt until your knees form a 90-degree angle. This is the start position. Next, float one leg off the ground. From here, squeeze your glutes and drive through your plant leg to lift your hips off the ground. At this point, your body should form a tabletop position from your knees to your shoulders. Relax towards the floor to complete the rep.
Frog Pumps
Frog pumps target your glutes so well that you won’t mind doing the move, even if it does result in weird looks from your family.
Lie on your back. Slide your feet on the floor towards your butt until your knees form a 90-degree angle. Then, rock your weight to the outside of your feet and allow your knees to drop open. Squeeze your glutes and drive through your feet to lift your hips off the ground. Go as high as your glutes will take you. You should feel this on the outside of your glutes, not your lower back. Relax towards the ground to complete the rep.
Hip Thrust
The hip thrust takes the glute bridge and elevates your shoulders to increase the range of motion. This makes the exercise more challenging.
Begin by sitting directly in front of a low couch, exercise bench, or any other soft-edged object that isn’t too tall. Place the middle of your shoulder blades on the edge of the bench and bend your knees 90 degrees. Now, drive through your heels, squeeze your butt, and push your hips towards the ceiling. Keep squeeze until your body forms a straight line. Then, drop your hips and pivot on your shoulder blades to return to the start position.
ADVANCED: Single-Leg Hip Thrust
The setup is the same as the hip thrust. Sit directly in front of a low couch, exercise bench, or any other soft-edged object that isn’t too tall. Place the middle of your shoulder blades on the edge of the bench and bend your knees 90 degrees.
However, things change after that to make this move our go-to advanced glute builder. You’re going to hover one leg off the ground in the start position. Now, drive through your planted foot, squeeze your butt, and push your hips towards the ceiling. Keep squeeze until your body forms a straight line. Then, drop your hips and pivot on your shoulder blades to return to the start position.
Bodyweight Core Exercises
If you’ve been waiting for the best bodyweight abs exercise, the payoff is finally here. There is no shortage of movement that works your core, as it’s the one body part that’s most commonly trained without weights.
While you can see plenty of results with a steady diet of planks and sit-ups, you’d be leaving plenty of variation on the table.
Easiest Option: Front Plank
Most people do planks wrong. It’s not about surviving for as long as you can. No, to get the most out of the front plank, you need to learn how to create tension in the position. The cool part? Being able to develop that full-body tension helps you perform other bodyweight moves better as well.
Start on the ground with your forearms under your shoulders, body in a straight line. Then, squeeze your core and then push the ground away from you with your arms. Hold this position while breathing in through your nose and exhaling through your mouth. At no time should your hips or shoulders drop. Stay tight!
McGill Situp
Training your abs directly through a movement like full situps or crunches can help build core strength. But, these movements also put a large amount of compressive stress on your lower back. That’s why banging out high rep sets of these moves probably isn’t a good idea. Instead, try this modified variation of the situp (created by spine researcher Dr. Stuart McGill) that reduces those forces on your spine while helping you build stability in the core.
Start by laying on your back with one knee bent and the other leg straight. Now, place your hands under your lower back (this will help you keep what’s called a neutral position). Pick your head and chest off the ground just a few inches and hold that position. Your lower back should not have moved. Hold this position for 10 seconds and then lower back down. That’s one.
Reverse Crunch
The reverse crunch works the 6-pack muscles of your core (and even helps target the lower ab muscles). But, what makes it a great abs exercise is that it also engages the muscles on the side of your core.
Lie on your back with your knees bent to 90 degrees, feet on the floor. Your arms should be by your side and pressing down into the ground. Flatten your lower back into the floor and lift your legs (keep the knees bent) until they are directly above your hips. Now, lift your hips off the floor and slowly bring your knees toward your head. Think about rounding your lower back as you curl up.
Side Plank w/ Reach Through
Lay on your side in a straight line; forearm tucked under your side. Your feet should be in a staggered position with your top leg in front. Dig your bottom elbow into the ground and push yourself up so that your elbow and your feet support your entire body. Now, allow your chest to drop down and reach under your body with your free arm. Think about rotating through the planted arm.
Body Saw
When it comes to your spine, the term “extension” refers to a rounded back (think: the “cat” position of cat-cow). Anti-extension exercises like the body saw train your core to resist this extension —something that will come in handy when you do an exercise like a deadlift, where “don’t round your lower back!” is a commonly heard cue.
First, place paper plates or furniture slides under your feet. It would be best if you had something that can slide on the floor. Then, get into a front plank position with your forearms under your shoulders, body in a straight line. To start the exercise, squeeze your core and then push the ground away from you with your arms. Slide back 6″ or so, and then pull the floor towards you to slide back to the start position.
Slow Russian Twist
Outside of burpees and kipping pull-ups, my least favorite exercise might be the Russian Twist. Actually, it’s the version of the Russian Twist you see at most gyms – seated, holding a medicine ball, while wildly pumping a med ball from side to side trying to carve your obliques. It’s a low-back injury waiting to happen. However, if you do the Russian Twist right, it’s a fantastic, no-equipment-needed way to train the core.
Take a seat on the ground, feet in front of you, and legs bent 90 degrees. Now, lean your upper body back to a 45-degree angle while keeping your feet on the floor. Reach your arms straight out from your chest. This is the start position. Slowly rotate your chest from side-to-side. Move slowly; this is not an explosive exercise. To make the movement more difficult, float your feet in the air.
ADVANCED: Reverse Crunch w/ Press Out
Legendary kung fu artist, Bruce Lee, is famous for the dragon flag. This high-level exercise requires heroic levels of core strength. While this move isn’t the full dragon flag, it is your first step towards building that kind of legendary core strength.
Use a weight bench, but if you don’t have one, find something directly above your head to grab onto – a table leg, bottom of the couch, etc. Then, lie on your back with your knees bent to 90 degrees, feet on the floor. Grab the bench above your head and lift your legs (keep the knees bent) until they are directly above your hips. Now, lift your hips off the bench and bring your knees to your elbows. Slowly reverse the motion, but as you come back, you’re going to straighten your legs while keeping your low-back flat.
Bodyweight Cardio Exercises
Listen, running isn’t for everyone. But, that doesn’t mean you can’t get in a great cardio workout. And, bodyweight exercises are another way to get up your heart rate without endless pounding on your knees.
Most bodyweight programs will insist that burpees are the best way to crank up your heart rate. That is true, but we haven’t met many people who actually enjoy burpees, so we’re going to save you the frustration.
There are plenty of other exercises that, when programmed correctly, offer all the benefits of HIIT (high intensity interval training), which is a great cardio alternative.
Easiest Option: Jumping Jacks
You know how to do jumping jacks. Gym class!
Mountain Climber
Start in a full plank position – arms straight, hands just outside your shoulders, and head in line with your spine. Squeeze your core and screw your hands out against the floor (like you’re opening a jar of pickles). Now, march one knee towards your hands. Quickly drive it back to the start position and bring your other leg forward.
Bear Crawl
To begin, get in an all-fours position. Your hands should be directly under your shoulders and your knees directly under your hips. Now, push the ground away with your arms and hover your knees just off the ground. This is the start position. Begin the move by reaching forward with one arm and the opposite leg. As you place that arm and leg on the ground, repeat with the opposite arm and leg. Keep repeating this pattern as you crawl forward.
Jump Squat
You can use jump squats for pain-free cardio if you focus more on absorbing the landing and not making each jump a “max” jump. Just jump high enough to get some air and focus on getting more quality reps in.
Start by standing in a shoulder-width stance, arms at your side. Rapidly bend your knees and hips, and reach behind you with your arms. Now, explosively drive your arms up and jump, trying to touch the ceiling. As you come back to the ground, try to land quietly like a ninja. Immediately reload into the start position and jump again.
ADVANCED: Walkout Push-up + Squat Jump
Think of this move as a “better burpee.” Instead of throwing yourself down to the ground, you’ll squat down and then use your hands to walk out to the push-up position. It’s a safer move for your lower back and still drives your heart rate up.
Start by standing in a shoulder-width stance, arms at your side. Squat straight down and place your hands on the ground in front of your feet. Now, walk your hands slowly away from your feet until you reach a push-up position. Keep your core squeeze to prevent the lower bag from sagging. Do a full push-up, then reverse the motion, walking your hands back towards your feet. As you return to the bottom of the squat, drive up and do a jump.
How To Build Your Own Bodyweight Workout
When focusing on bodyweight training, programs designed for individual muscles or body parts are probably not the best choice for you. Instead, it’s better to focus on a full-body workout that will challenge your entire body.
Here’s why: The more muscle mass you can use with each exercise, the more effective you’ll be in building new muscle and strength.
That’s what makes full-body bodyweight training so powerful. Instead of training with isolation moves like bicep curls, you’ll train movement patterns like squat and push. And when you train movements, you won’t forget muscles.
The workout we’ve created here is a 2-day alternating full-body split. The plan is simple enough to work for beginners and still has enough progression options to challenge more advanced trainees.
Why just two training days? Because bodyweight training requires higher levels of skill development. And like any skill, you’ll need practice if you want to get better. You can’t just show up once a week and expect to master these moves. This plan gives you a chance to practice the moves multiple times per week.
Ideally, the workout is performed 4 times within 7 days while avoiding training on back-to-back days.
A sample schedule might look like this:
Monday – Day 1
Tuesday – Rest
Wednesday – Day 2
Thursday – Rest
Friday – Day 1
Saturday – Rest
Sunday – Day 2
Day 1
A1. Hamstring Exercise 3×5-20
A2. Chest Exercise 3×5-20
B1. Single-Leg Exercise 3×5-20
B2. Back Exercise 3×5-20
C1. Bicep Exercise 3×5-20
C2. Core Exercise 3×5-20
D1. Cardio :30 of work, :30 rest x 5 rounds
Day 2
A1. Leg Exercise (Squat variation) 3×5-20
A2. Shoulder Exercise 3×5-20
B1. Glute Exercise 3×5-20
B2. Back Exercise (preferably Chin-ups) 3×3-10
C1. Core Exercise 3×5-20
C2. Tricep Exercise 3×5-20
D1. Cardio Cardio :30 of work, :30 rest x 5 rounds
When exercises have the same letter and different number (A1 and A2, for example) perform them as a superset, doing one exercise after the other, and then resting for about a minute.
The key to this workout is you choose the intensity. There are no expectations. The goal is to work hard and then improve each workout. It doesn’t matter how slow or fast you start. It’s all about where you’re going and the progress you’ll make.
How to progress the workout?
Start on the low end of the rep range for each movement. As you build strength, add reps each week. Once you reach the top end of the rep range (usually 20-25 reps), look to make the movement more challenging by adding bands or switching variations.
Wait a second, where’s the HIIT training?
Why am I not channeling Shawn T and blasting you with timed burpees followed by little rest?
Because bodyweight training is very similar to exercise at the gym, it’s about getting better and stronger, week-over-week. It’s not about smoking yourself with negative rest periods (less rest than the amount of time it took you to complete the exercise).
Those workouts can be fun from time to time (and I do put them in our client’s programs, usually done as an optional circuit day once per week).
But, the fact is, using exhaustion to rate your workout “success” isn’t a good idea.
Plus, bodyweight HIIT workouts are a recipe for injury (and it’s my job to help you train hard pain-free). Most of us are just not prepared for timed, high-impact exercises like jump squats.
So, skip the home HIIT workouts. You’ll get more benefit out of strength training plans like we just shared and restorative low-intensity cardio like walking.
Taking It Further: How To Add Resistance Training When You’re Ready
At some point, rep-after-rep-after-rep doesn’t do the job, no matter how hard it feels. And, this is especially true for bodyweight workouts. If you want to make the most of your time training, you might need to add resistance at some point.
The most budget-friendly (and space-efficient) way to do that is with resistance bands, not dumbbells.
Here’s why: Unlike a single pair of dumbbells, a resistance band set like this provides months and months of progression runway for relatively little cost. When a move becomes easy, swap in a thicker band.
And bands have been proven to help you build strength and muscle. As long as your bands provide enough resistance (more on that in a second), research has shown that banded push-ups can create just as much strength as the bench press.
Yes, you read that correctly. However, the study participants were doing heavy band push-ups (6 rep max). Most of us aren’t using that heavy of a band during the push-up, so your strength results might vary.
While it’s true that heavier loads at the gym might lead to higher muscle contraction force, that doesn’t mean higher loads are better at building muscle.
Research suggests you can build just as much muscle at lower intensities (less weight, more reps) as long as you push each set close to failure. And band training is perfect for that. The bands force you to control each movement’s entire range of motion and help maximize your muscle tension.
Ready to start challenging your body with resistance bands? Check out our blog post here for a full, 4-week resistance band workout. Plus, a detailed video explanation for each exercise.
READ MORE
NO EQUIPMENT HOME WORKOUTS: FAT LOSS EDITION
THE TRUTH ABOUT THE 7-MINUTE WORKOUT
WHAT’S THE BEST HOME GYM EQUIPMENT?
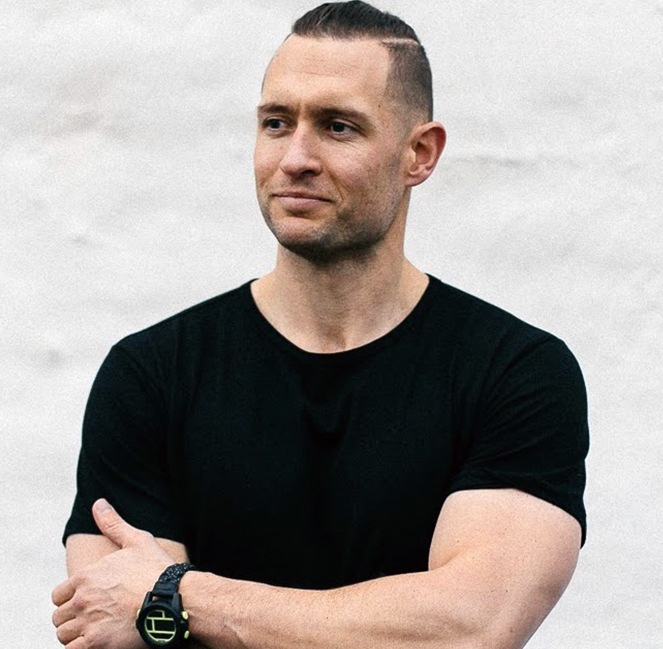
B.J. holds a B.S. in Health and Human Performance and multiple certifications, including Precision Nutrition Level 1 and BioForce Certified Conditioning Coach. Over his 14-year coaching career, he’s been fortunate enough to coach a wide range of clients. From online clients looking to get in great shape to CEO Nate Checketts (Rhone) and CEO Marcelo Claure (Softbank), and professional skateboarder Sean Malto. Before beginning his training career, he was a sports science lab research assistant.
Unbelievable! Seemingly well educated people like you recording exercises with a mask on! Are you at least getting paid good money for being part of the propaganda, neglecting massive censorship and refusing to look at the facts?
Please take the time and watch at least this:
https://thehighwire.com/videos/live-from-event-2021-in-dallas-tx/
https://youtu.be/6IRDOjziESc
I’m not sure who would be paying us to wear a mask. These exercises were filmed at a time when wearing masks were the recommended approach and guidelines set by the city. Our approach is to do what’s best for the greater good of all and to respect the boundaries, concerns, and health of other people. If you don’t believe in the mask mandates, then that’s your choice. But, there isn’t harm or risk in wearing a mask.
A very educational article. I read it with pleasure.
I fully agree! And sorry, I didn’t mention it in my first post.
I just was so shocked about the videos on a website from someone I hold in high regard for his scientific and in depth approach to the subject of fitness and nutrition that I simply forgot. It still puzzles my mind…
Thanks for the interesting information on this post. Its very necessary to show the advantadges about the workout at home and it’s very helpful for everyone to know this content to do a right workout routine.
¡Keep it like that, cheers!
Happy to hear the information was useful! Thank you for reading and for practicing safe home workouts!
I’ve a question about decline pushups, do I’ve to start from 12-16″? Or can I do it at a height of 5-6″ and have the same effect?
Hey Nina, feel free to start from a lower platform. In fact, this approach will help you build strength with great form and a 12-16″ might be too aggresive to start with.
Then, as you get stronger, slowly increase the height of the box you’re using. And yes, you’ll still get all of the benefits of the decline push-up. 🙂
It’s really work.
That’s great to hear, your content is really helpful for the gym savvy persons just like me and I am really thankful to you for sharing such a wonderful article on creatine fitness Rhodes. This article shows exactly what I was looking for on the web.
Lots of great videos and techniques here, the Bear Crawl might be my new favorite
Bear Crawl is such a good one. Glad you found this article useful!
Hello
This is jack and i went gym last year but due to pandemic i am not able to continue further and i put on more weight but after reading your article i want to start again exercise to keep fit myself. I follow your all instructions and diet plan which you share regularly. After doing exercises i feel postive and energetic.
Thank you
It is a very wonderful article help to us. Thanks for sharing these which are very needed in our daily life. I have a fitness/motivational blog as well! There will have about your health and fitness. Without health and fitness life is of no value. For attraction, wellness, you can read it regularly.
I’d love to try the Walkout Push-up + Squat Jump.
Awesome! Let us know how it goes!
Very nice blog. Everybody can do workout at home with the help of this article.
Getting fit is a major struggle for many people and as much as the gym is involved diet plays a major role in the individual fitness journey. A low-carb diet with lots of protein is good but also natural weight loss supplements such as green tea play a big role, green tea helps in the burning of fats and detox.
Thank you for the insightful article.
Thanks for sharing this info. Really helpful for those who seek to gain weight through workouts.
Great article, I will for sure try these home workout exercise as soon as possible!
Love to hear you’re trying these out! If you run into any questions just give us a shout.
Sure, I’ll do!
Great info in this article, I always search for some easy home workout exercises, I think I found some of it here, thanks a lot !
Very happy to hear you found this article useful, Lana! Let us know if you have any questions.
Thanks for sharing this info, such a great article.
Very useful blog.. thank you for sharing
Home exercise is best exericse .
Thanks a lot for sharing this amazing blog with us. Such amazing article keep sharing.
The plank is the best one to keep the body fit with stamina power.Really this blog is helpful
I totally agree with you that “Bodyweight training is joint-friendly.” I have been trying all these above-mentioned body weight exercises for the last few months now and it’s saving me a lot of gym membership money!
Actually, last year I tore my left knee cartilage during a heavy free-weight squatting session.
As a result, I’ve faced Chondromalacia patellae for a few months, that time used to get server shock of pain with just bending of my knee. Recently, my ortho suggested taking halt from the gym for some time and only perform safe bodyweight exercises.
Can’t agree enough with you…how regular bodyweight training has helped me rehab my knee in just a time of 3-4 months.
Right now, I’m in a better position to walk and squat. Left knee is still kinda weak than my right one but now the pain is gone. Hope to get well soon with these excercises!
Thanks for such informative content, especially the videos are really helpful to understand the posture!
Sorry to hear about the injuries you’ve encountered. But we love to see you rehabbing with recommendations from your doctor!
We are big advocates of bodyweight training and happy to hear how it’s helped you in your fitness journey.
A very informative blog on Bodyweight Exercises. Thank you for sharing such a wonderful blog.
Very inspiring and meaningful to me!
I always do chin-ups and pull-ups and I will definitely try the exercise that you have shared. Thanks, BJ for sharing this amazing article on bodyweight exercise.
thanks for sharing this useful information
Such an amazing article keep sharing thanks
Very informative Post. Thank God I discovered this Fitness Blog
Thanks for giving brief information about workout at home. Everyone should be aware of home workout routines to stay healthy and fit in lockdown. And like you said, everyone needs to follow a routine.